
Tutorial: How to make a chain stitch in crochet?
The chain stitch – also called a slip stitch when made in multiples – is the quintessential basic stitch in crochet. It's often the very first stitch you'll learn when you start crocheting. It serves as a starting chain In other words, it's a series of chain stitches that form a chain, onto which you can crochet the following rows of your project. Whether you're making a scarf, a garment, or any other project, you'll generally start by crocheting a foundation chain.
In addition to creating the base of your project, the chain stitch is very important when reading crochet patterns. Its name is often abbreviated as ch in the explanations (for example: "ch 10" means to make 10 chain stitches). This basic stitch also serves as the foundation for other more advanced stitches, and you will find it everywhere: it is therefore essential to master it well from the beginning.
Step-by-step tutorial: making a starting chain
Ready to take your first steps in crochet? Follow this beginner's step-by-step crochet tutorial to learn how to make a chain stitch and create your first starting chain. Don't hesitate to take your time and try again several times – this basic stitch requires a little practice, but once you get the hang of it, you'll be able to embark on all sorts of projects!
Materials needed: a crochet hook and a yarn of your choice (for practice, preferably choose a medium yarn that does not split easily, and a crochet hook suitable for the size of the yarn, for example a 4 mm hook).
Step 1: Tie a slipknot
Start by making a slip knot with your yarn, then slide this knot onto your crochet hook. Gently pulling on the loose end of the yarn tightens the knot around the hook without locking it. You now have a loop around the hook: this is the starting point for beginning to chain.

Create the shape shown above

Pass the thread through the loop

Then tighten to form a loop

Pass the hook through the loop and adjust
Step 2: Make the first chain stitch
Carried out a throw That is, pass the yarn over the hook, from back to front. Then catch this yarn with the hook (the hook has a small notch, also called a "beak", designed to hold the yarn).
Gently pull the hook towards you and downwards to pass the yarn through the loop (the slip knot) that was on the hook. The loop from the slip knot has now been passed through by the yarn: you have created a chain stitch, and a new loop is now on your hook.

Make a throw

Pass the hook through the loop on the last

Adjust the tension (neither too tight nor too loose)
Step 3: Adjust the chain length
Repeat the previous step until you have the number of chain stitches needed for your project.
For example, if the pattern says "chain of 8 stitches," you'll need to make 8 chain stitches in a row. A chain is simply a series of chain stitches: you've just made one, well done!
Be careful not to count the loop still on your hook in the total number of stitches (this loop is not a finished stitch).
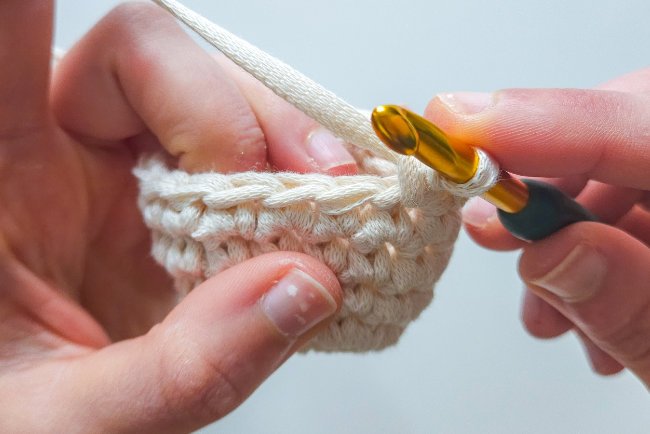
Your starting chain is ready : you can now continue your work by crocheting the stitch provided for the next row (often, you insert the hook into the second chain stitch from the hook to begin the first row of single crochet, double crochet, etc., according to the pattern).

8 ml which form a chain
FAQ: Everything you need to know about Cast Mesh
How to get a regular chain
The key to a regular chain is the tension of the wire. Try to maintain the same tension for each chain stitch. To do this, position your hands correctly: hold the chain between your thumb and forefinger, and control the yarn's movement with the forefinger of your other hand. Each chain stitch should be formed with a similar tension: neither too loose nor too tight. With a little practice, your chain stitches will all be the same size and your chain will be perfectly even.
Why is my chain too tight or too loose?
If your chain stitches are too tight, it's probably because you're pulling the yarn too hard or using a crochet hook that's too small for your yarn. Conversely, a chain that's too loose often comes from a lack of tension (the yarn slips too freely). Make sure you control the yarn tension with your fingers. A tip if you tend to pull too tight: use a hook one size larger just for the chain, then switch back to the recommended size for the rest of the project. This will help you achieve a looser chain.
What if my starting chain is too short?
Don't panic! If you realize you don't have enough chain stitches once your chain is finished, the easiest thing to do is undo it and make a longer one. Generally, it's better to start over with a good foundation rather than trying to fix a chain that's too short. However, you can add yarn and a few extra chain stitches to the end of your chain, securing them with a slip stitch, but this method is a bit advanced. For a beginner, it's best to start the chain again correctly at the right length.
How to distinguish the top and bottom of a chain?
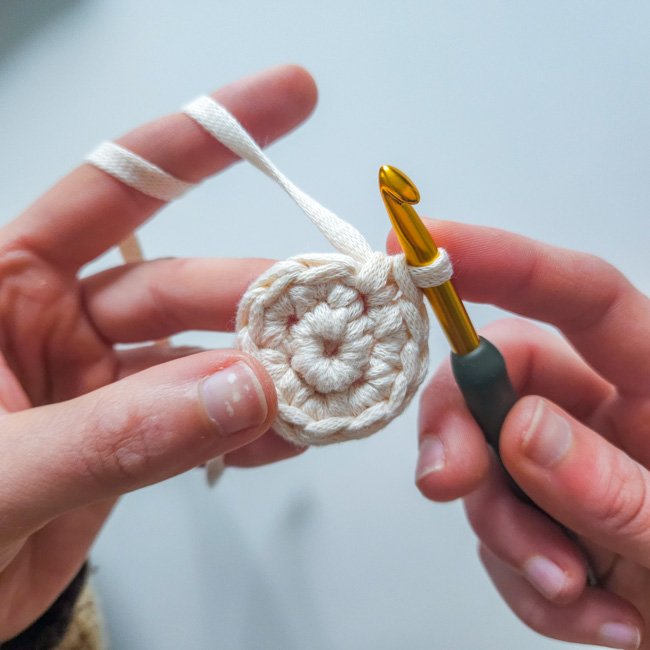
A chain of stitches has two different sides. On the top of the chain (the right side), each chain stitch looks like a small "V"« These are the two strands of the stitch. On the underside of the chain (the reverse side), you can see a series of small balls or «"bumps"» aligned. When you're told to insert the hook into a chain stitch, you generally need to insert it under the two top loops (the "V") of that stitch, as this gives a strong result. Knowing the top and bottom will also be useful if you have to crochet in the round: to close a chain ring, you join the two ends of the chain with a slip stitch in the first stitch (be careful not to twist the chain).
What is the purpose of the chain stitches in other crochet stitches?
Chain stitches aren't just for starting a project! You'll find them very often in patterns as transition stitches or cast-on stitches between other stitches. For example, at the beginning of a row, you use turning chain stitches (also called "« rising stitches »" to gain height before continuing with higher stitches.
In practice, 1 chain stitch is enough to begin a row of single crochet, 2 chains for a row of half double crochet, and 3 chains (which count as the first double crochet) before starting a row of double crochet. Chain stitches are also used to create spaces in certain openwork patterns: for example, you can alternate 1 double crochet, 2 chains, 1 double crochet to create a small gap (the 2 chains create an opening between the double crochets).
Can a more flexible chain be made?
Yes, absolutely. A loose chain is even preferable so as not to hinder the rest of the work. If your chain is too stiff, loosen the yarn a little when you make your chain stitches. You can also use the trick mentioned above: use a hook half a size or a whole size larger to crochet the foundation chain, then continue with the recommended hook size for the rest of the project. This way, your chain stitches will be slightly wider and the chain will gain elasticity.
You now know how to make a chain stitch (which you might find written as "chain" in US English crochet patterns) and create a nice, even starting chain. Don't hesitate to practice until you're comfortable with this basic technique: it will be useful in almost all your crochet projects.
Discover our other crochet tutorials:
How to make a slip stitch in crochet? Step-by-step tutorial
Learn the slip stitch (sl st), a basic crochet stitch. Ideal for closing a row or magic ring and creating a pretty finishing edge.
How to make a single crochet stitch? Step-by-step tutorial
Learn how to make a single crochet stitch, an essential basic crochet stitch for beginners. Step-by-step tutorial

How to crochet a magic circle? Step-by-step tutorial
Learn how to make a magic crochet circle to easily begin crocheting in the round without a central hole. Step-by-step tutorial.