
Tutorial: How to make a slip stitch in crochet?
Slip stitch is one of the basic points Crochet is essential for beginners. It's a very short stitch used as a joining point and decorative stitch. Specifically, the slip stitch is used to close a crochet row or a circle (for example, finishing a round without leaving an opening) and to create clean edges on the work. Its abbreviation in French patterns is mc (maille coulée), and you will find it under the abbreviation sl st (slip stitch) in English patterns.
The slip stitch is somewhat different from other stitches: it doesn't add any extra height to the work (it remains at the level of the existing row). This means that it's not used to "build" volume, but rather to to assemble or to decorate.
Thanks to this feature, you will see the slip stitch used in several useful situations: for example, closing a magic crochet circle, joining the beginning and end of a chain to crochet in the round, moving over a few stitches without increasing the height, or adding a neat crochet border at the end of a project.
We'll go over all of this in detail in this step-by-step tutorial. Don't panic, the slip stitch is one of the easiest crochet stitches to learn! You'll master it in no time.
Step-by-step tutorial: how to make a slip stitch
In this tutorial, you'll discover step by step how to easily make a slip stitch. This essential technique allows you to:
• Neatly close a magic circle or a round crocheted row
• Create a beautiful decorative border on your projects
Follow the steps below carefully, using the provided images for guidance. Take your time, and don't hesitate to repeat the steps to master the technique!
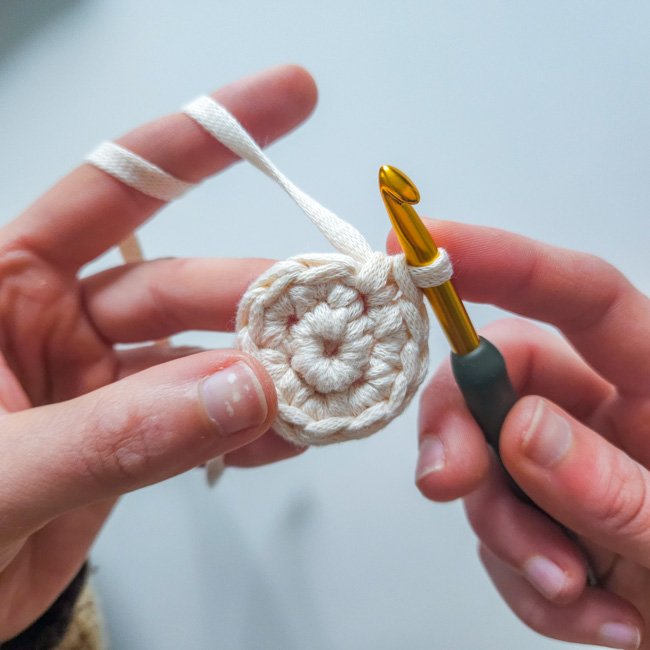
Step 1: Prepare at the beginning of the row or border
Whether you want to close a magic circle or add a border, start by leaving the last loop you crocheted on your hook. Don't cut your yarn; you'll continue directly into your slip stitch.

beginning of row
Step 2: Insert your hook into the next stitch
Insert the head of your crochet hook under the two loops (the two sides of the "V") of the next stitch.
This stitch often corresponds to the very first stitch made at the beginning of the round (to close a circle or a row), or simply to the next one to make a decorative border.
Your crochet hook should now have two loops:
• the initial loop (the one that was on your hook at the beginning)
• the two strands of the stitch you just made.

Insert the hook

in the next stitch
Step 3: Make a throw
Wrap your yarn around the hook, from back to front (this action is called "making a yarn over").
You now clearly have two distinct loops on your hook: the initial loop, and the loop created by the yarn over.

Make a throw
Step 4: Pass the yarn through both loops
With a gentle movement, pull the yarn you just wound (the yarn over) through the two loops already present on your hook:
• the stitch where you inserted the hook,
• and the initial loop.
Your yarn thus passes through both loops simultaneously, creating a neat and low slip stitch.

Pass through the two loops present on the hook

And here's the result!
FAQ: Everything you need to know about Cast Mesh
What is the difference between a slip stitch and a single crochet stitch?
The slip stitch is much shorter than a single crochet. In fact, it doesn't add any height at all: it's an almost invisible stitch that simply covers the existing stitch. It essentially serves as transition or finishing point.
The single crochet stitch, on the other hand, creates a higher stitch that builds the texture and thickness of the work. Single crochet stitches are used to create the body of a piece (they are one of the basic stitches for crocheting fabric), while slip stitches are used occasionally for joining or decoration.
In summary, the single crochet stitch is used to crochet an object, whereas the slip stitch is used to finish or join parts of that object.
Which stitch should I insert my hook into to make a slip stitch?
Generally, you stick the hook in the next stitch, under both strands, exactly as for making a single crochet. In other words, unless otherwise indicated in the pattern, the slip stitch is made by inserting the hook into the stitch immediately after the one already worked.
For example, to close a round of crochet, you'll insert your hook into the first stitch of the round (or the starting chain, depending on the pattern) before making your yarn over and slipping the stitch. If you're making a slip stitch along the edge, you insert your hook into each stitch along the edge in succession. There may be variations (sometimes the pattern specifies inserting the hook into the front or back loop only for a particular effect), but to begin, remember that you normally insert your hook under both loops of the target stitch to make a slip stitch.
Why is my slip stitch too tight?
It's common for beginners to find their slip stitches a little too tight. First, understand that the slip stitch is naturally tighter than other stitches: this is normal, since it has no height and holds firmly onto the base stitch.
However, if your slip stitches seem too tight, making the work difficult, it's probably a minor issue with the yarn tension. The key is to keep your loop loose on the hook When you make a slip stitch, avoid pulling the yarn too tightly as you pull it through the loops, otherwise the stitch will become excessively tight. Try crocheting more loosely, letting the yarn glide smoothly without forcing it. With a little practice, you'll find the right tension. Another tip: you can use a hook half a size larger just for your slip stitches; this will prevent them from being too tight. Remember that slip stitches should not be crocheted too tightly.
In summary, relax: by improving your tension and with experience, your slip stitches will become more flexible.
Can the slip stitch be used as the main stitch?
In theory, yes, one could imagine crocheting an entire piece using slip stitches, but in practice it's not at all common. The slip stitch isn't meant to be repeated over several rows as the main stitch, because it doesn't add height.
If you tried to work a series of slip stitches, you would have a lot of trouble picking up the needle in each stitch (it's very tight) and your work wouldn't progress vertically. Therefore, one rarely works several rows of slip stitches in succession in a classic pattern.
However, it is almost always used in combination with other stitches: for example, you will make slip stitches to close a ring of single crochet stitches, or to add a decorative final row to rows of double crochet stitches, etc. Some more advanced techniques still use the slip stitch over many rows for a specific effect (such as an elastic rib stitch obtained by crocheting in the back loop, which can give a result imitating knitting).
But if you're a beginner, remember that the slip stitch is primarily used as a supplementary stitch, not as the foundation for building a complete project. In short, use it for what it does best—joining, finishing, embellishing—and rely on stitches like the single crochet or double crochet to form the bulk of your projects.
Now you know how to make a slip stitch in crochet and when to use it. It's a simple stitch, but very useful for giving your crochet creations a finished look. Don't hesitate to practice: the more you use the slip stitch, the better you'll become. your movement will become sure and your tension regular. Whether it's for closing a magic crochet circle, joining a row, or creating a flawless crochet border, the slip stitch will quickly become one of your best allies in your creative projects.
Discover our other crochet tutorials:

How to make a chain in crochet? Step-by-step tutorial
Beginner crochet tutorial: learn how to make the chain stitch (starting chain, abbreviated “ch”), an essential basic crochet stitch, explained step by step.
How to make a single crochet stitch? Step-by-step tutorial
Learn how to make a single crochet stitch, an essential basic crochet stitch for beginners. Step-by-step tutorial

How to crochet a magic circle? Step-by-step tutorial
Learn how to make a magic crochet circle to easily begin crocheting in the round without a central hole. Step-by-step tutorial.