How to Read a Crochet Pattern?
You’ve just started crocheting, and patterns feel like they’re written in a foreign language? Don’t worry — you’re in the right place! In this guide, I’ll walk you through how to easily understand a crochet pattern.
For this tutorial, we’ll use the free octopus keychain pattern available on Yarn and Crochet.

Here’s the little octopus you can make with this pattern.
In every Yarn and Crochet pattern, before jumping into the instructions, you’ll find a few introductory pages: a cover page with a photo of the final result, followed by practical information (like usage rights and copyright).

Then comes an essential section: the materials list you need to start your project. Let’s dive into that first step!
Understanding the Materials List
To start your crochet project with peace of mind, the first thing to do is check you have all the required tools. For the octopus keychain pattern, here’s what you’ll need:
• 2,5 mm Crochet Hook : Perfect for creating tight, defined stitches that won’t let stuffing escape.
• Cotton yarn: The pattern recommends 100% cotton 8/4 yarn. The sample uses “Rainbow” yarn from Hobbii, but you can substitute with any similar quality yarn.
• Black yarn for the eyes: Used for embroidery. The pattern uses “The Basic” from Katia, but any similar black yarn will do.
• Stuffing : Essential to give your project volume. Choose a soft, even polyester filling for best results.
• Stitch marker : Helps mark the start of each round so you can keep track easily.
• Yarn needle: Used for weaving in ends and sewing parts together neatly.
• Scissors: Always on hand to snip yarn as needed.
• Keychain clasp : The final touch to turn your little octopus into a functional keychain.

Choosing the Right Materials
You don’t have to buy the exact yarn brand mentioned in the pattern. You can use an equivalent yarn you already have — just make sure it’s the same thickness and fiber type. For example, any 8/4 cotton yarn will work if that’s what the pattern calls for.
Using the same thickness ensures your finished item will match the size of the original. The yarn composition also matters depending on your project (e.g. toys, clothes, accessories).
Stick to the recommended hook size for your yarn to maintain the right texture and tension. Of course, using a thicker yarn and larger hook will make a bigger piece — and thinner yarn with a smaller hook will result in a smaller one.
On Yarn and Crochet, you can usually see the full materials list directly on the pattern’s product page. That way, you can check everything before even downloading the file — no surprises when it’s time to begin!
Decoding Crochet Abbreviations
Some of the most common ones include: mc (magic Circle ), ch (chain), sc (single Crochet), sl st (slip stitch), inc (increase), dec (decrease), FLO (front loop only), and BLO (back loop only).
If you’re new to these abbreviations or just want a refresher, no worries! I’ve grouped all the essential tutorials in one place to help you learn and practice each stitch:

Understanding the Pattern Layout
Once you’re comfortable with the materials and abbreviations, it’s time to look at the pattern itself.
The Written Instructions
First, look for information on how the piece is worked — the pattern will say if it’s worked in rounds or rows. In our example, the octopus is crocheted in continuous rounds, meaning you don’t join at the end of each round — you just keep going in a spiral. This technique helps avoid visible seams.
You might also see a reminder of the yarn and hook used, especially if the pattern uses multiple yarns for different parts.
Each line in the pattern corresponds to a round (or row) with:
• The stitch instructions to follow
• The number of stitches you should have at the end, usually shown in brackets like [24]
Tip: Place a stitch marker at the beginning of each round. It helps you keep your place and count your stitches more easily.
Sometimes, like in rounds 5 to 7 of the octopus pattern, you’ll see the same instruction repeated for several rounds. That just means you do the exact same thing over and over for that section.
Pro tip: I like to keep a small notebook or post-it nearby to tick off each round as I finish it. It’s a lifesaver if you take a break and forget where you left off.

Step-by-Step Photos
One of the best features of Yarn and Crochet patterns — both free and premium — is the presence of step-by-step photos throughout. These images appear alongside the text so you can compare your progress visually.
They show you:
•What each stage should look like
•Where to insert your hook for special stitches
•Key details that are easier to understand with pictures
Final Touches
At the end, you’ll find finishing instructions — in our example, this includes how to embroider the eyes (with placement guides) and where to attach the keychain clasp to complete your piece.
These final steps are quick, but they make all the difference. Take your time and refer to the photos to get everything in the right place.

Extra Tips to Succeed with Your Pattern
Reading a pattern is great — but here are a few bonus tips to help your crochet go even smoother:
1. Use a stitch marker
Absolutely essential for round work. It shows you exactly where each round starts so you can:
• Count your stitches easily
• Place your hook accurately
• Spot mistakes early
Tip: No marker? Use a contrasting thread or safety pin in a pinch.
2. Track your progress
When a pattern has repeated rounds, it’s easy to forget where you were. Keep notes on your phone or use a notepad to track which round you’re on — it’ll save time and prevent mistakes.
3. Maintain consistent tension
A steady hand gives you clean, even stitches. Too loose, and your piece may look floppy. Too tight, and it might warp or be hard to work into. Relax your hands and let the yarn flow naturally — practice will help!
4. Choose your yarn carefully
Now you know how to read a crochet pattern! From understanding materials and abbreviations to following rounds and using helpful tips, you’re ready to take on your first (or next!) project with confidence.
The little octopus keychain is the perfect place to start — it’s fast, fun, and super satisfying to complete.
Don’t forget to share your creations on Instagram and tag @yarn_and_crochet_ — I’d love to see how you bring the pattern to life!
So… grab your hook, and let’s get started
Discover our other Crochet articles:

Crochet gauge swatches: Why and how to make them?
Discover why crochet swatches are essential to the success of your projects and learn how to make them and adjust your tension.
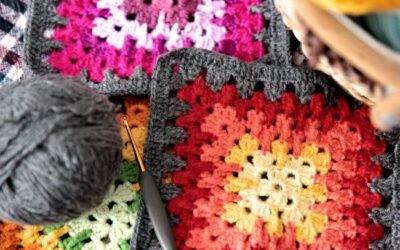
Granny Squares in Crochet: the beginner’s guide
Learn to crochet granny squares easily: origins, magic circle tutorial, diagram reading and lots of creative project ideas.

10 Easy Crochet Accessory Ideas for Beginners
Looking for inspiration for your next crochet project? In this article, you’ll discover 10 trendy accessories that are easy to make, even if you’re just starting out. From colourful scrunchies to rucksacks, get all the creative ideas you need to express your talent while having fun.

by Katy
Creator of Yarn & Crochet